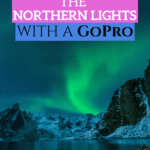
Curious about Aurora photography? I know I was before my first trip to Northern Norway! I have seen the Northern Lights (or the Aurora Borealis as they are also called) countless times, and know taking photos of them can be tricky. So I decided to write this guide to taking photos of them with a GoPro!
I was also really curious as to how to take pictures of the Northern Lights, and what were the right camera settings for Northern Lights photos. I assumed that I wouldn’t really be able to take photos of the phenomenon, as I thought you needed to be a professional photographer in order to capture them. But it turned out, that wasn’t the case!
I was especially curious as to whether I could use my GoPro for taking photos of the Northern Lights, and whether the action camera was able to catch them properly. The GoPro is just so much easier to carry around, and I wasn’t going to invest in any fancy camera gear before my trip.
Well, I am excited to say that in the end, taking photos using my GoPro worked like a charm! I also believe I found the perfect GoPro settings for Northern Lights, and so I wanted to share them in this post!
Since that first trip, I have been back to Northern Norway several times, in addition to having seen the Auroras/Northern Lights several times further south as well (all though they are never as strong there). And, I am happy to say that these settings work like a charm every time!

Table of Contents
Is a GoPro good enough for Northern Lights photos?
First of all, let me say that I am not a photographer. At all. As mentioned, I don’t have that much fancy gear or equipment, and I am still learning every step of the way. I am proud to no longer be shooting in automatic mode with my Canon (I use the Canon EOS M3), and I am slowly starting to enjoy playing around with it.
Since I first bought the camera, I have purchased an extra lens, and feel very fancy when changing them out. But still, I am just a hobby photographer.
In addition to my Canon (which is a hybrid, not a pure DSLR), I have my trusted GoPro Hero 6. I absolutely love it, and it was a complete game changer when I upgraded from the GoPro Hero 3+.
It’s super easy to use, and figuring out how to take pictures of the Northern Lights with the GoPro was great fun! Of course, since i got the Hero 6, GoPro has released new models, each a little better than its predecessor (and a better camera for Aurora photography with the GoPro.
Head this way to see the latest GoPro models available.
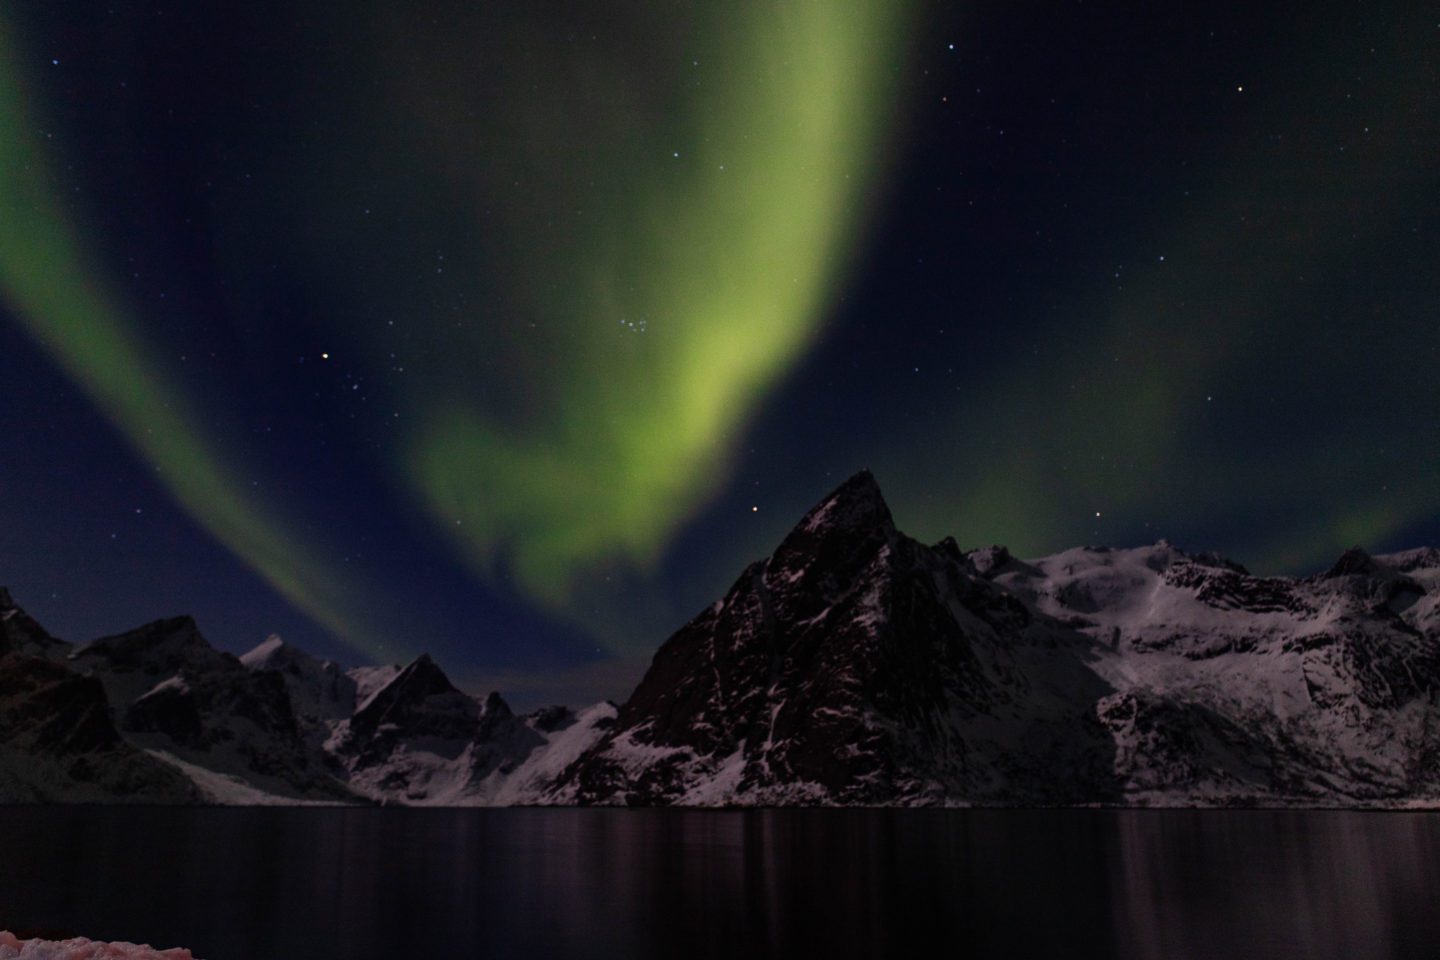
Side note: The photo above was taken with my Canon, just to illustrate the quality you can get with the GoPro vs a hybrid camera. All other Northern Lights photos in this post I have taken using my GoPro Hero 6.
How to take pictures of the Northern Lights
So you want to know how to take pictures of the Northern Lights with your GoPro? You’re not alone.
The Aurora Borealis is one of many reasons people choose to visit Norway, and with very good reason. Prior to my first trip up north, I had only seen them once, when they were strong enough to be shown in the village where I grew up (Aurland, in Western Norway).
So your first point of action should be to rid yourself of the assumption that the Aurora Borealis are constantly dancing above our heads here in Norway.
Ever since I saw them that one time, I had wanted to see them again, and I’ll admit I wasn’t even that fussed to get a photo of them when I went to visit Lofoten in winter. I just wanted to see them again.
However, once I saw them, I felt a sudden urge to get a good photo of them, so I could show the world what magic I had experienced in the night sky.
In addition to Lofoten, there are loads of other great places in northern Norway to see the northern lights. One of the top places to see them is Tromsø, where you will find a huge selection of tours (here are my top 5) that take you out of the city to chase the lights. Another great spot is Alta.
About the Northern Lights/Aurora Borealis
Basically, when there is an explosion on the sun, it sends particles towards earth that are electrically charged. This, apparently, happens all the time.
Due to the solar winds (and the magnetic “shield” of the earth), these particles hit our atmosphere around the north and the south magnetic poles of the planet. When these particles collide with gases such as hydrogen and nitrogen, they create an incredible show of light that can (some times) be seen with the naked eye.
For a more scientific (and probably better) explanation of the Northern Lights, head this way.
You may have noticed how I said that the Aurora Borealis can some times be seen with the naked eye. This is something I learned the hard way during my trip to Lofoten, as I actually believed that the Northern Lights always looked like they did when I saw them at home. Unfortunately, they don’t.
Apparently, the lights can only be seen when they are sufficiently strong. Your camera, however, can probably catch it even when you can’t see it yourself. This makes Aurora photography a little easier, because a lot of the time, you can take photos of them even though you can’t see them yourself.
However, I really hope you get to see the Northern Lights yourself, and not just through your GoPro. It is such a stunning sight, there truly is nothing that can compare to it!
So, bear this in mind before your trip up north to see the Northern Lights. I’d hate for you to get disappointed (like I was at first). Luckily, we were lucky to catch an amazing show on our final night there, and I’ll be crossing my fingers for you too! All the photos in this post are from that same night, because it was the night they were the strongest.
Also, all photos were taken with my GoPro Hero 6 (except for that first one at the top of the post).
7 Tips for Aurora Photography with a GoPro
Now, when you are heading out to catch photos of the Northern Lights with your GoPro, there are a few things I would like to point out first. If you just want to head right to my exact GoPro camera settings for Northern Lights, scroll a little further down to the bottom of the post.
Here, you’ll get my best GoPro photography tips for the Northern Lights (and for taking GoPro night photos in general).
#1 Check the forecast
Now, if you’re wondering whether I mean the Aurora forecast or the weather forecast, I actually mean both. First of all, it is difficult to predict the visibility of the Northern Lights, but one thing is for sure, and that is that if it’s cloudy, you can’t see them (duh). So start by checking the weather forecast in advance, to make sure that you have a clear sky, or at least that the sky isn’t completely covered by clouds. Ideally, you can see the stars.
Then, check the local Aurora forecast, on websites such as this one. Again, do keep in mind that it is not easy to give an exact estimate of the Aurora on a specific night in the future, but on the same day (and in the hours leading up to the evening/night), it should be quite accurate.
This means that if your trip to Norway is a few weeks out, there is no point checking the forecast. However, once you have arrived, you can start checking the forecast daily. Don’t forget to check the weather too!
The Aurora Borealis is measured on a scale from 1 to 9, where anything above a 5 or 6 can be seen in Southern Norway and further south (as the strength grows).
On the night we saw the lights in these photos, the measure was a 5, if I remember correctly.
#2 Dress well
You may think that this goes without saying, but it needs to be said regardless. In order to see and get photos of the Northern Lights, you need to go quite far north in Norway. And the further north you travel, the colder it is. In addition, if you are interested in taking photos of the Northern Lights, you’ll need to be very patient and prepared to spend hours outside.
Hours of waiting in the cold naturally means that you must dress well. As in, not only dress for the cold, but dress for enduring the cold for a long time. Think layers and wool – the two key factors Norwegian keep in mind when dressing for the cold. And do get one of these hand warming heat packs to keep inside your mittens or in your pockets before you go.
My (Norway) winter packing guide should have you all set for your trip!
#3 Get the right gear
Like I’ve said before, I don’t have the fanciest of gear for my camera or GoPro (except for when I go diving, when I have waterproof housing and dive filters and all the fun stuff).
But I do have some basics, and without them, I probably wouldn’t have been able to use my GoPro for shooting the Northern Lights. So before you go, make sure to invest in at least a proper Tripod or Gorilla Pod. Why? To keep your GoPro as steady as possible for your photos.
Otherwise, they’ll come out blurry as a result of the long shutter speed you need to get good Northern Lights photos.
#4 Avoid light (when you can)
It’s quite well known that when you want to take photos of the Northern Lights, you need to head somewhere dark. That’s why most Northern Lights tours, such as the ones leaving from Tromsø, make sure to take you out and far away from the city before you start chasing the lights.
In addition to this, you need to avoid as many sources of light as you can. To put it in photographer language (and remember guys, I am in no way a professional photographer), you need a very long shutter speed when shooting something in the dark. Such as when taking photos of the northern lights.
This is to allow more light to be “captured” by your camera, and it also means that any sources of light will be amplified. This is great when it comes to taking photos of the Northern Lights, and very important to know when learning how to take pictures of the Northern Lights.
Here’s an example for you. See the extremely bright light in the photo below? Believe it or not, but that’s actually the moon! Even though the moon seemed quite small and far away with my eye, with my GoPro night settings it came out so strong and bright it actually seems to have rays.
So try your best not to get any other sources of light in your photo, even the moon.

#5 Take the wide angle of the GoPro into account
Additionally, as you can see from the photo above, the GoPro Hero has a very wide angle. You may be able to see the people in the far left of the shot? That’s due to the (incredible) wide angle of the GoPro.
As far as I know, it is not possible to turn off the Wide Angle function when shooting in Night Lapse Mode, so unfortunately this is something we have to live with (for now). More about the exact GoPro camera settings for Northern Lights I used below.
So, take into account that the GoPro Hero (all of them, as far as I know) has a very wide angle, and set up your shot accordingly. The newer GoPros actually have a preview touch screen where you can get an idea of what the photo will look like, so try to use it wisely.
Alternatively, if you have an older version of the GoPro (as mentioned above, I had the GoPro Hero 3+ for ages and I loved it – you can get it here!), connect it to the GoPro App and check your frame on there.
#6 Be patient and just leave it!
Patience is a virtue that I usually don’t possess, but I quickly learned that when it comes to Aurora photography I didn’t have much choice.
The camera settings for Northern Lights I’m gonna share with you below involves using the Night Lapse Mode, which is a setting where your GoPro continues to take photos until you stop it yourself (or it runs out of battery). Thus, in order to get the best photos possible; leave your camera alone once you’ve got the settings right!
Of course, it will take a little trial and error at first, to get the right spot for where you want to take the photos, where the wide angle doesn’t look off etc. But once you have it figured out, just leave your GoPro to do the work, and enjoy seeing the spectacular Northern Lights.
Seriously, you have no idea how many of my photos turned out a little blurry because I just had to check what they looked like as I was going. My tip is to allow the GoPro to get at least 5 photos before you check to see if you need to rearrange something or edit any of the settings. Trust me.
#7 Go at the right time
I am often asked what the best time to see the northern lights is, especially for taking photos. Obviously, the right time is at night..
Joking!
I have covered the best time to visit Norway to see the northern lights in detail before. To summarise, the winter months are definitely the best, with January to March being a widely popular time of year to go.
As always, the weather plays a role, and the amount of darkness during the time of year you visit. Opt for the winter months, and as mentioned above, check the weather forecast often.

My Exact GoPro Camera Settings for Northern Lights
I know this is what you came here for, but I hope you have gotten some value out of the Aurora photography tips I have shared above. When learning how to take pictures of the Northern Lights I still have a long way to go myself, but thought I would share any tips I could think of.
In short, using your GoPro night settings is very different from taking photos with it in the day time, and it becomes slightly less challenging when wanting to shoot the Northern Lights using your GoPro.
So, here are my exact GoPro camera settings for Northern Lights.
Start by setting your GoPro into Night Lapse Mode.
Shutter Speed: 10-20 seconds
I started with my shutter speed at 15 seconds and ended up going down to 10 seconds for the shots in this post. This will depend on the light near you, and of course, it could be that you need to go up to 25 or even down to 5 seconds. But start in the 10-20 seconds range, and make small changes as you go.
ISO limit: 100-350
Same as above. Start somewhere in the middle of this range when it comes to your ISO limits. Then, make minor changes once you have a couple of photos to look at. What is so neat about the GoPro is that it finds its own ISO according to the limits you give it, so once you find an ISO you are happy with, I advise you to narrow down the limits a little. That way you control the camera a little more.
Interval: Continuous
This makes it so that your GoPro just keeps taking photos without you having to press the button for each one. This avoids any potential blurriness in the photos, as you don’t have to touch the camera in between shots.
White Balance: 3000k
This can be adjusted depending on the look you want. I’ll be honest and say I was too excited to see the lights to even bother trying to change it. I just left it at 3000k for the entire night.
Aperture: F/2,8
I believe the GoPro finds this automatically on its own, and it is not something you change/edit yourself. But I’m keeping it here so you know what I shot my photos in.
Protune: On
This is basically what gives you the option to change some of the settings that I have mentioned above. So, before you drop into my comments complaining that you can’t figure out where to change your shutter speed, or that you don’t have an option to change your ISO limit, make sure your Protune is set to On. You’re welcome.
Spot meter: Off
The spot meter is in short what helps your GoPro find its automatic exposure. Therefore, this setting needs to be off so that you can change these settings yourself.

Aurora Camera Settings with a GoPro
Now, again, I’d like to repeat that I am not a professional photographer in any sense of the word. This is just how I managed to shoot the Northern Lights, and I am sharing my exact Aurora photography settings with you.
I hope it is helpful, and that it will allow more of us hobby photographers (or just anyone with a GoPro) to shoot epic photos of the Northern Lights using their GoPro camera. With these GoPro northern lights settings you should be good, no matter which model you have!
If you want a more specific example than the camera settings I shared in this post, the photo above had a 10-second shutter, an aperture of f/2,8 and ISO of 399 to be exact. The photo further up in the post where you see the boat had the exact same settings, except for the ISO, which was 258.
I hope you enjoyed these Aurora photography tips and GoPro camera settings for Northern Lights! As mentioned, I was way more excited about seeing them myself than get photos of them, but once I started taking the photos and seeing the results, it took over my excitement completely!
I truly hope you have an amazing experience seeing the Northern Lights, and that you get some epic photos of them!
Northern Lights Photography Tours in Norway
Of course, now that you have read this post you are more than equipped to go on and get photos of the Auroras using just your GoPro.
However, if you want a professional’s help, there are plenty of Northern Lights tours in Northern Norway where you go chase the Northern Lights with professional photographers, who will help you find the right settings for your camera in order to get great photos. Most of them leave out of Tromsø, the tour capital of Norway (in my opinion), and you can see a selection of them below.
Side note: I have reviewed and selected the best northern lights tours in Tromsø here.
Can GoPro Capture Northern Lights? Final Thoughts
Photographing the Northern Lights with a GoPro is an exhilarating experience that allows you to capture the beauty of the night sky. With the right settings and a little guidance, it is perfectly possible to capture stunning images of this natural phenomenon.
In this guide, I have shared valuable tips and techniques to help you make the most of your GoPro and bring home incredible shots of the Northern Lights. By following these steps, you’ll be well-prepared and equipped to capture the magic of the Aurora Borealis!
So grab your GoPro, head to a dark and clear location, and dive into the world of Northern Lights photography!